What you will learn #
Use this chapter to organize websites in one account, give colleagues or clients appropriate access, manage your sign-in and preferences, and understand your plan, renewals and payment records. It is for account owners and team members. Each person should use their own login, and each client should see only the sites intended for them.
Before you begin #
You need a Hitsteps account, or a team login created by the person who manages that account. Sign in at Member login using the email for that login. The account owner and a team member are different identities, even when both can see the same website.
Before adding sites or people, check the current allowance in License. Plan limits apply to the account. Adding a website entry does not install tracking on that website. You also need permission to install its tracking code or ask its maintainer to do so.
The account owner's Account, Security, Dashboard and Visitors tabs are separate from a team member's personal account page. Team members can change their own supported preferences and use their own 2FA controls. Account-wide options remain with the owner. Billing Access is a separate permission; it can allow a teammate into license management without making that person the account owner.
This chapter describes controls found in the current product source. Public login and help pages were checked on November 8, 2026. The signed-in workflows below were not submitted against a live account for this guide. If your screen lacks a control, check the role, account provider and plan before following its steps. Feature access can have additional eligibility requirements beyond a plan's advertised allowance.
Step by step #
A. Add and verify a website
- Open My Sites. Check that the website is not already listed. Open an existing entry rather than creating a second entry for the same installation by mistake.
- Choose Add New Website. In Website domain, enter a domain such as
your-store.example. Do not paste HTML, a tracking snippet or a product-page URL. - If needed, expand the additional settings. Website friendly name is the label you want to recognize; Short Summary describes the website. Review the email-report option before saving. Report delivery settings are explained in Reports, exports and scheduled reports.
- Choose Continue to tracking code. If the site allowance has been reached or the page cannot check it, resolve that message first. If a duplicate-site confirmation appears, review the existing site before proceeding.
- Follow the installation route for that website in Getting started or Integrations and mobile. Install one supported plugin/app or the complete snippet, taking care not to install both on the same pages.
- Open the actual website, then return to the correct site's tracking setup and dashboard. Follow the setup page's activation check and confirm a visit reaches that site's reports.
- Repeat for each additional website. Use My Sites or the site switcher to move between them. Check the selected website before changing a setting or sending a report.
Expected result: each website has its own entry and tracking setup. A portfolio view is a way to navigate and compare sites; an individual site's reports remain tied to that site.
B. Give a colleague or client a separate login
- Sign in with a login authorized to manage users and open Multi-user management. For an agency, first decide whether the agency owns the account or the client owns a separate account.
- Choose Add New User. Enter the person's email, a password and a nickname. An avatar is optional. Use an email that is not already assigned to another account or team login in this service.
- Under Sites, select the websites this person should access. This is a multiple-selection field; follow its on-screen selection hint when choosing more than one site.
- Leave View All unchecked for a client who must see only the selected site. When View All is enabled, the selected-site list is ignored and the user gains access across the account's sites. Treat this as elevated access.
- Leave Billing Access unchecked unless this person should manage payment and license subscriptions. Site access alone does not grant billing authority.
- Choose the person's preferred language, then Save. Check the success or warning message. The form creates a login with a password; do not assume that an invitation email was sent.
- Share access details privately. Ask the person to sign in using their own email and check that they see the intended site. In a client handover, also check that other clients' sites are absent.
- If the person should answer visitor chats, follow the users page's Chat Agent link and configure that role separately. Creating a user does not by itself make that login a chat agent.
To change access later, open that person's Edit form, adjust Sites, View All, Billing Access, language or other supported fields, and save. Review the selected sites after turning View All off. The edit form also supports changing the user's password. Use Delete only when you intend to remove that login and have reviewed the confirmation.
C. Update your profile and report timezone
- Open Account Options. Owners use the Account tab. Review the email address, nickname, first name, last name, phone, country and preferred language. Save only the changes you intend.
- A team member uses their personal account page. Their email is read-only there; the page directs them to their administrator for an email change. A blank password field preserves the current password on that personal form.
- Owners can find Report timezone on the Account tab. Read Reports use … and its status before changing anything.
- Choose Auto (recommended) to let the account update from the timezone of a browser opening the dashboard. Choose a specific displayed timezone to turn automatic updates off and lock the account to that choice.
- Choose Save timezone. Read the resulting status. After selecting Auto, open the dashboard from a browser in your intended timezone so it can update.
This is one timezone setting for the whole account: its sites move together. The panel shows whether it is automatic or locked and when it last changed. New accounts start at UTC before an update. Do not repeatedly toggle the timezone to try to repair old reports. If earlier dates or totals appear wrong, contact support with the date range and expected timezone; historical correction needs investigation.
D. Adjust dashboard and visitor preferences
- Open the owner's Dashboard tab. Choose Auto (system setting), Dark mode or Light mode under Theme. Auto follows the device's system appearance.
- Review the chart mode and refresh controls. Dashboard graphs use seconds; the recent-visitors refresh control uses minutes. Use the displayed unit on each field, including uptime refresh and idle-visitor removal.
- Review new-visitor sound and notification-message preferences. Where a sound is selected, Test previews it. Browser notification or audio behavior can also depend on browser permissions.
- Save the dashboard preferences. Then open Visitors to choose fixed timestamps, relative timestamps or Use both, automatic expansion of pageviews, and organization-name display.
- Save that tab's changes. Keep timestamp display and report timezone distinct: changing how a timestamp is presented does not select the account's reporting timezone.
The Visitors tab can also show newsletter subscription and affiliate support-access controls. Read those separately from display settings. In particular, Grant Affiliate Access permits the associated affiliate to access the account for support. Do not grant it simply to receive affiliate commissions. Use Revoke Affiliate Access when that support access is no longer wanted.
E. Change a password or recover access
- To change an owner's known password, open Security → Change Password. Enter the Current password, the new password and New Password Again, then choose Change Password. The owner form requires at least eight characters and matching entries.
- A team member can change their own password from their personal account page. If they cannot sign in, they should ask their account administrator to change it in Multi-user management.
- An owner who has forgotten the password should open Member login, enter the account email and choose Forgot Password?. This requests a recovery email. Only do this when you intend to request that email.
- Open the recovery message privately and follow its link. The current recovery screen asks you to log in with the password you want to use; that completes the reset. If the link is no longer valid, request a fresh one rather than reusing an old message.
- If the email is recognized as a team login, follow the message directing you to the administrator. Do not create a second owner account as a password-recovery workaround.
Never share a password, recovery link, backup code or a screenshot containing one in a public support thread.
F. Enable two-factor authentication
- Owners open Security → Two-Factor Authentication. Team members open their personal account page and choose Enable 2FA Now or Manage 2FA.
- Choose Enable Two-Factor Authentication. Use a TOTP-compatible authenticator such as Google Authenticator, Microsoft Authenticator, Authy or 1Password, and follow the setup instructions shown.
- Enter the current six-digit Verification code, then choose Verify and Enable 2FA in the owner's setup. Starting setup alone does not finish enabling it.
- Save the backup codes privately. Each can be used once if you lose the authenticator. The owner's screen offers Print, Download and I saved them. Keep these codes somewhere you can access if your usual device is lost.
- Check that the status is Enabled. During later password sign-in, complete the authenticator challenge when requested. Use the backup-code option only when you intend to consume one.
The owner's Regenerate Backup Codes form asks for the password. Replace your stored set after regeneration. Disable 2FA asks for the password and an authenticator or backup code, with a This is a backup code checkbox for the latter. Disabling 2FA removes authenticator-code protection; existing passkeys remain available. It is not a method for removing passkeys.
G. Add or remove a passkey
- On a supported browser, open the owner's Security → Passkeys section. If your login does not show it, use the sign-in methods actually offered for that login and contact support about eligibility.
- Enter a recognizable Device name, such as “Work laptop,” and choose Add Passkey.
- Complete the browser or device prompt. It may use your device's supported unlock method or security key. Wait for Passkey added and confirm the new row appears.
- Check the row's Device, Domain, Created and Last used fields. Use the same service domain when signing in with it.
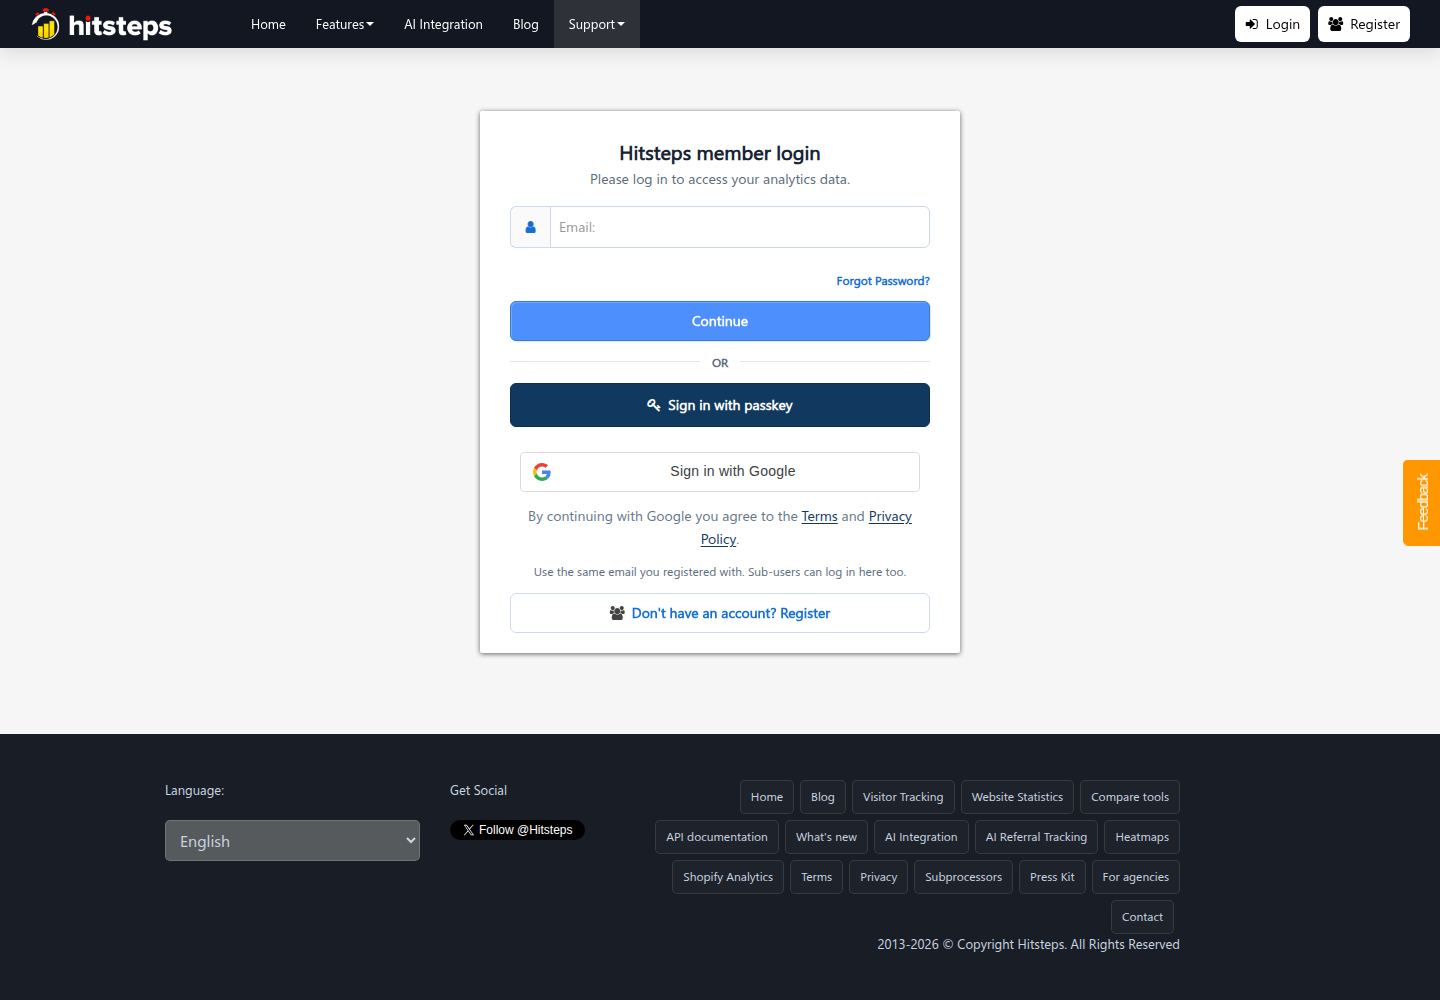
- On the login page, choose Sign in with passkey and follow the browser prompt. Cancelling that prompt does not complete sign-in; the page offers password sign-in as an alternative.
- To retire a credential, find the correct row and choose Remove, then review its confirmation. Keep another working sign-in method before removing a passkey you rely on.
The current owner's Security screen explains that passkey sign-in also completes authentication without a separate authenticator code when 2FA is enabled. Passkeys still require the browser/device verification prompt. Do not assume every browser, embedded app view or account-provider domain offers the same passkey support.
H. Use Google sign-in with the correct login
- Use Sign in with Google on the login page when the option is available, and select the Google account associated with the intended Hitsteps login. The option can show loading or unavailable states.
- To connect Google to an existing login, first sign in using that login's current method. Owners open Security → Google sign-in; team members use the Google section on their personal account page where present.
- Confirm your current password and choose Continue. Then choose the Google account to connect. Wait for the confirmation and Connected as … status.
- One Google account can be connected to one login. If it already opens another login, resolve that association before connecting it elsewhere. Connecting Google is not a way to merge accounts or combine their sites.
- If you originally signed up with Google and never set a password, use the offered password-reset route before a workflow that requires password confirmation.
- To disconnect, choose Disconnect in the Google section. Make sure you have another usable sign-in method first.
Facebook connection controls may also appear when enabled for the service. Follow the displayed connected/disconnected state; their presence is conditional. A Google or Facebook sign-in is not the same as connecting a website's Google analytics or search data.
I. Review a plan, upgrade or renew
- Open License. Read Current license, its end date or remaining duration, the trial state and any renewal controls. An expired-trial message does not mean a paid plan was selected automatically.
- Compare usage with the proposed plan. The selector shows Last 30 days pageviews, websites and uptime monitors. Check all three dimensions rather than choosing by traffic alone.
- Choose an available plan. Review included features and limits, not only its name. The public plan comparison is the reference for current advertised options; the signed-in page applies account and provider eligibility.
- Choose the offered Billing period and Payment method. Periods and providers vary. Review the total due, currency, billing interval and renewal description. A monthly equivalent is not necessarily the amount collected today.
- If an annual option or account-specific offer appears, review its displayed conditions and the amount due. Offers and receipt-linked savings are conditional; do not assume another account or provider gets the same terms. Use the actual offer link or selection provided, rather than assuming a universal coupon field exists.
- Continue only if you intend to buy or authorize the plan. Card checkout uses Stripe; PayPal, Shopify and Wix have their own approval flows when offered. Choosing a plan or period on the review screen is not proof of a completed payment.
- After completing the provider's confirmation, return to License and verify the resulting plan and renewal state. Check Payment History or the provider's receipt as appropriate. If the result is unclear, contact support before starting a second purchase.
The trial message says it ends automatically without turning into a paid plan; you are charged only when you choose a paid plan and complete checkout. A Free-plan option, where offered, checks usage and account eligibility when applied. It is not an automatic fallback. Some Free-plan messages require resolving incompatible features such as funnels. A control to delete funnels and their history is destructive; do not use it as a casual way to clear a billing message.
J. Manage or cancel automatic renewal
- Open License and identify the renewal method actually shown. Manage billing, Cancel, Pause auto-renewal, Resume auto-renewal or provider-specific guidance appear only in applicable states.
- To stop renewal, choose the applicable Cancel control. Read Before cancelling, select the main reason, and review the final cancellation action. Any alternative offered there is a separate choice; selecting an annual plan is a purchase decision, not cancellation.
- For card billing, the flow can open Stripe's billing portal. Complete the cancellation confirmation there. For other methods, follow the provider-specific flow displayed by the account. Wix-managed renewal is controlled through Wix.
- Return to License and inspect the renewal state and access end date. A request submitted to a gateway is not the same as a verified provider confirmation. If an error appears or renewal still looks active, contact support.
- If card billing offers Pause auto-renewal, read the confirmation separately. The displayed success message says current paid access lasts until its existing end date. Use Resume auto-renewal before that date if you want recurring billing to continue.
Cancellation of automatic renewal is distinct from disabling the account or removing website data. Do not use Disable Account to cancel a subscription. The documented renewal cancellation leaves access to expire after the current license's remaining duration; inspect your account's actual result. If the page warns that both card billing and a legacy PayPal renewal method may be active, ask support to help reconcile them.
K. Read payment history and download an invoice
- Open Payment History using a login that is allowed to see it. If a billing-enabled teammate is redirected, use their Manage Billing & License route or ask the owner. Do not assume every billing surface is available to every delegated login.
- For an ordinary completed payment, review Invoice #, Date, Amount paid and Plan purchased. Choose Download PDF on the correct record. Keep the download link and document private.
- If the page offers Update your billing information, enter the requested business/address text and choose Apply only if you intend to update the invoice information. The confirmation says the address has been applied to invoices; this is not merely a preview.
- For Shopify, distinguish a Record ID and contract amount from a payment receipt. The page explicitly says Shopify bills the store directly and directs you to Shopify for payment receipts. An unverified contract record is not proof of a collected payment.
- If there are no records, read the message: no payments may have been made, or payments may still be pending. Supply support with the payment date, provider and a private reference if you need help reconciling a charge. Do not buy again solely because a record is missing.
L. Use an agency, reseller or affiliate arrangement
- For an agency-owned account, the agency manages and pays for the plan containing client sites. Add each site, verify its installation and give each client a limited login as described above.
- If clients should own and pay for their accounts, have them use their own accounts instead. Do not promise that a client can be moved between accounts or that histories will be merged; ask support about a specific transfer requirement.
- For referral participation, open Affiliates and copy your personal referral link from that page. Share the link before the referred person signs up. Check the public affiliate program for current participation and payout terms rather than treating commissions as a guaranteed credit on an invoice.
- Read the affiliate balance and ledger separately. Rows show date, amount, description and a status such as New, Paid or Cancelled. Use the available redemption/contact route for questions about an eligible balance. Do not interpret every row as a payment already sent to you.
- Treat referral participation, agency site management and white-label resale as separate arrangements. A normal agency account does not establish entitlement to run a branded reseller service.
- If a provider supplies your account under its own brand, use that provider's setup and billing instructions. Registration, site creation, security options, help links and plans can differ. Ask the provider about permissions or billing controls that are absent.
White-label and reseller functionality is conditional on the provider arrangement. This guide does not grant access or promise that a standard plan includes it. On provider-branded deployments, use the provider's offered plan and support route; Hitsteps retail offers and program links are not universal tenant instructions.
Worked example #
Imagine an agency manages your-store.example and your-studio.example. Both domains and the person below are fictional.
- The owner adds and verifies each website separately.
- The owner creates a login for
reviewer@example.com, selects onlyyour-store.example, and leaves View All and Billing Access unchecked. - The client signs in with that login and confirms that the store appears while the studio does not. The agency checks the saved access choices before handing over the login.
- The owner reviews License and the account-wide usage. No new plan is purchased merely because a client login was created.
- The owner chooses the intended report timezone for the whole agency account. Both sites use that setting; the client is not promised a separate timezone per website.
Expected result: one managed portfolio, distinct site reports, a limited client login and a clearly identified billing owner. If the client sees the studio, stop the handover and review View All and Sites.
Public login screen, November 8, 2026, isolated English browser. The fields are empty and no sign-in or recovery request was submitted. Google sign-in can load separately; this image does not prove a Google authentication succeeded.
Controls and metrics #
| Control or value | Meaning |
|---|---|
| Website domain | Domain registered as a tracked site; not the tracking code or a single report URL. |
| Website friendly name / Short Summary | Recognition label and optional description of the website. |
| Sites | The selected-site access list for a team login when View All is off. |
| View All | Elevated account-wide site access; overrides the selected-site list. It is not another name for billing permission. |
| Billing Access | Permission to view/manage supported payment and license subscription flows; does not make the teammate the owner of every account setting. |
| Chat Agent | A separate chat assignment, configured through the chat-agent page. |
| Nickname / avatar / preferred language | Login display identity, optional image and language choice. |
| Allow direct login … | Account option allowing direct dashboard login from supported links in emails and plugins. Treat those links as private access material. |
| Report timezone / Auto / locked | Account-wide reporting zone; Auto updates from a dashboard browser, while a picked zone disables automatic updates. |
| Fixed / relative / both timestamps | Display as a timestamp, an elapsed time, or the combined behavior described by the Visitors tab. This is separate from report timezone. |
| Chart mode | Chart presentation where applicable: default mix, column, line, spline, area or area-spline. |
| Refresh interval / idle removal | How often the specified display updates, or when idle visitors leave the online list; use each field's unit. These are not data-retention controls. |
| Auto-expand pageviews / organization display | Expand visitor pageviews automatically, or use an ISP/organization name instead of an IP when no visitor name is assigned. |
| New-visitor sound / message | Dashboard notification preferences. Test previews the selected sound. |
| Backup codes remaining | Unused one-time recovery codes for authenticator access. |
| Trusted devices | Saved trusted mobile 2FA devices, with their trust/expiry status; Revoke and Revoke All Trusted Devices remove that trust. |
| Passkeys active | Registered active passkey credentials, listed with device, service domain and usage dates. |
| Mobile sessions / registered push devices | Mobile sign-in sessions and notification registrations. Revoke sessions and Disable push devices affect different things. |
| Recent Activity | Mobile security events with time, action and reason. The summary uses successful and failed/blocked events in seven days; it is not website visitor traffic. |
| Current license | Current access plan and its duration/state. A trial and a paid subscription are different states. |
| Last 30 days: pageviews | The rolling traffic usage shown in plan selection. Pageviews are not unique visitors. |
| Websites / uptime monitors | Counts used when comparing the account with a plan's respective allowances. |
| Monthly equivalent / Due today | Normalized monthly price versus the amount currently due; read both along with currency and interval. |
| Billing period / auto-renewal | The purchase interval versus whether another payment is authorized at renewal. One-time and recurring options differ. |
| Invoice # / Amount paid / Plan purchased | Fields for a payment record. Download PDF opens its invoice document. |
| Shopify Record ID / contract amount | Contract/accounting information; do not treat it as proof that a payment was collected. |
| Affiliate balance / status | Referral balance and ledger state, separate from a subscription's paid status. |
| Grant / Revoke Affiliate Access | Controls for affiliate support access to the account, separate from referral tracking. |
In Security → Mobile Access, review a device or session before choosing Revoke, Revoke Active Mobile Sessions, Disable, or Disable All Push Devices. These are access changes, not report-display preferences. Removing a push device should not be described as cancelling billing or deleting an account.
Problems and fixes #
| Problem | What to check and do |
|---|---|
| A teammate sees another client's site | Review Sites and View All. Turn off View All for limited access, save the intended sites and recheck the actual login. |
| The user's email is rejected or recovery points to an administrator | The email may already belong to an account or team login. Edit the existing login or use an appropriate unused email. Team password recovery goes through the administrator. |
| A site or user-management control is missing | Check the current login's role, the selected account and provider restrictions. For a site-add limit message, inspect the plan's website allowance. Ask the owner/provider rather than changing accounts at random. |
| Times are shifted or dates disagree | Read Report timezone and its Auto/locked state. Check the browser timezone, account and date range. Contact support about historical discrepancies. Timestamp display preferences alone do not fix the report zone. |
| An authenticator code fails or a passkey prompt is unavailable | Check the authenticator device's clock and the current code, or the supported browser/domain for the passkey. Use an unused backup code or another working sign-in method as offered. Never send the code to support. |
| Google sign-in opens an unexpected login or is unavailable | Use the intended Google identity and inspect Connected as on the existing login. Wait for a transient loading state; use password/passkey access if Google is unavailable. Do not create another account to merge access. |
| Checkout returned without changing the plan, or a receipt is missing | Review the provider result, License and payment history. Shopify receipts come from Shopify. Contact support before repeating a payment when the first result is uncertain. |
| Renewal still looks active after cancellation | Complete any provider confirmation, then check the actual status. For a gateway error or a warning about two renewal methods, contact support. Disable Account is not the cancellation control. |
If repeated login failures trigger a CAPTCHA or a wait message, complete the requested human verification and respect the displayed wait. Repeated submissions are not a recovery method.
Access, privacy and limits #
Plan allowances and feature access
The public comparison checked on November 8, 2026 lists Free, Starter, Growth, Pro and Business, with larger Scale and Enterprise options. Use current plans and your own License page for current eligibility and amounts. This chapter does not reproduce prices or create an offer.
| Advertised plan | Tracked websites | Detailed data history | “Number of chat agents and users” allowance |
|---|---|---|---|
| Free | 1 | 14 days | No additional allowance shown |
| Starter | 2 | 30 days | 1 |
| Growth | 5 | 60 days | 3 |
| Pro | 30 | 180 days | 10 |
| Business | 100 | 360 days | 15 |
These are the published comparison labels, not a promise that every feature is enabled for every account. The user/agent allowance must not be read as two separate pools or a role specification. Confirm how it applies to your account before planning a team. Detailed data history does not define invoice retention, mobile security-event storage or the retention of session recordings, heatmaps and other separately gated features. See their chapters for their own limits.
Roles and account arrangements
| Login or arrangement | Boundary to keep in mind |
|---|---|
| Owner | Manages the account-wide profile, timezone and owner security options. |
| Team login with selected sites | Uses assigned sites and personal settings; account-wide owner options are separate. |
| Team login with View All | Receives elevated access across sites and may manage users; this is unsuitable for isolating one client. |
| Team login with Billing Access | Can enter supported license-management flows; individual payment-history and provider actions can have additional restrictions. |
| Agency | Chooses agency-owned versus client-owned accounts and pays according to that arrangement. |
| White-label/reseller customer | Uses the provider's permissions, plan and help route. Retail offers, affiliate links and security controls may differ or be absent. |
Keep profile information, team email addresses, security-device details, affiliate balances and invoices private. Do not paste credentials, invoice URLs, access links or recovery material into public screenshots. Review account access when staff or client relationships change.
For a Data Processing Agreement, contact support; the public privacy policy says DPA forms are available on request. Read the current privacy policy, terms and subprocessors. This chapter does not add a legal guarantee or a new retention promise.
Verification limits
Available controls depend on your account role, provider and eligibility. Follow the access message shown for your account, and contact support if an expected control is absent.
Last checked #
Checked 8 November 2026 using product documentation and source, with public pages and safe sample screens where available. Account-specific access, provider controls and effective limits can differ; use the current message shown for your website. Examples are illustrative.